Apache Tutorial
Set up a Ubuntu/Apache cloud-based server
Final Preparations
_______________________________________________
Contabo/Nightly Preparations
You should now have a Contabo account. Make a link to your Contabo account in your Firefox Nightly browser shortcut. Here's how:
Find your Firefox Nightly icon on your desktop. Right click it and choose Properties. Look for the Target: line. At the very end of the line, insert a space and then paste https://my.contabo.com/account/login onto the line. Click OK. Double click the shortcut and you should have the login page for Contabo showing. Enter your credentials and log in. Minimize Firefox.
_______________________________________________
Prepare your working server text file
We will be using a basic text file to store the commands and info you need to build your web sevrer.
Create and open up a text file for your project. Pick a name for your server and save the text file with that name. I save it on my desktop so it is easily accessible while I work on the server. For my file, for example, I may use the name 'V-601' but make one up that you like. Keep it short. The name isn't critical. I refer to this file as server text file from now on.
Copy and paste the following lines inside your server text file. Only copy what's in the blue box. You'll learn what these things mean in a moment:
######
ssh root@Your-IP
-->  Contabo account password you created and saved when you opened the Contabo account: ######

-->  Your-Password is: xxxxxxxxxxxxxxxxxxxxxxxxxxxxxxxx
-->  right-click inside powershell to paste!
###
###  Almost as fast as you setup the server, someone will be trying to hack in!
###
NOTES
Hash marks don't do anything except to REM (remark) out the line. This means the server goes past it without action.
Your-IP is a place saver for your future server IP. Internet Protocol, or IP, is the address of your server online. IP's are usually in the format of XXX.XXX.XXX.XXX or some smaller group of XXX's. 142.250.176.14 is the IP address for Google.
--> Contabo account password: is a placeholder for the password you made earlier when you created your Contabo account.
--> Your-Password: You must create a unique password where the xxxxx's are. Make one up. Keep it 32 characters long with different characters. No repeats. Use uppercase letters, lowercase letters, numbers and special characters except parenthesis and single or double quotes. Those show up from time to time in code and can mess things up. Seriously, there are some ways that a special character can really mess up your plan. I stay between the number 1 and 8 including the shift character with those keys. I use 9 and 0. I use the 26 alpha characters with the shift keys as well. That should be enough to create a strong password.
Lines starting without # or --> are commands that will be entered into PowerShell.
I use --> to make notes along the way, or to direct you to enter a command.
SAVE THIS FILE. We will add to it many times and it will be your own personal log of installation actions. When we finish here, you can use the server text file again to build another server or add additional domains to your web server.
_______________________________________________
A D V E R T I S E M E N T
_______________________________________________
Open Up PowerShell
Here's how:
On Windows 10, right-click the Windows button. ![]()
Select Windows PowerShell (Admin) 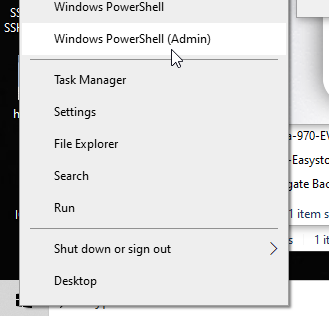
Allow it to open.
This is the window you will see: 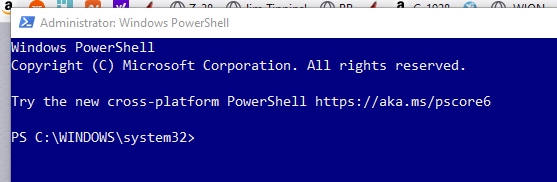
On Windows 11, left-click the Windows button. 
Type PowerShell and select Windows PowerShell (Run as Administrator) 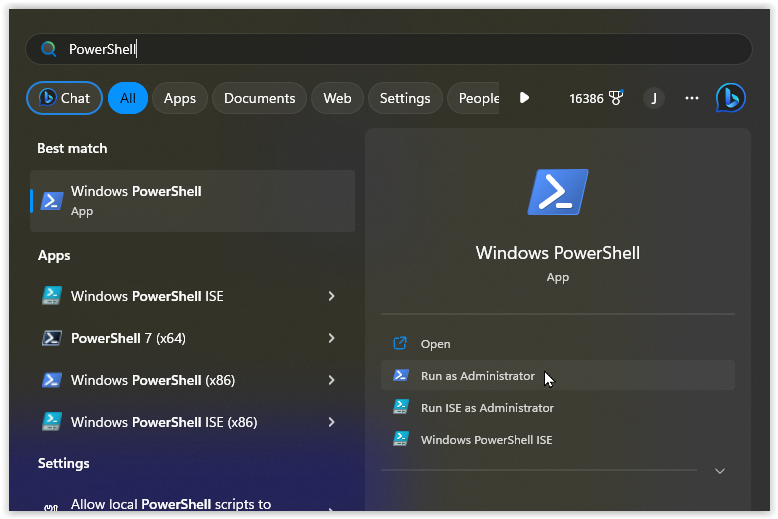
Grant permission and allow it to open.
This is the window you will see: 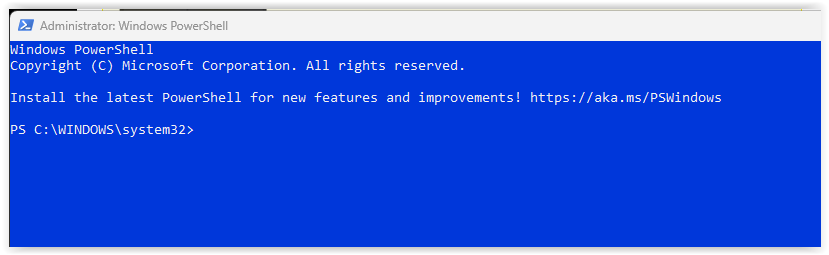
Organize your desktop so you can see the PowerShell window and the server text file. Minimize everything else.
Restore your Nightly browser to see your Contabo account. You should see the Control Panel section. Select Your Services.
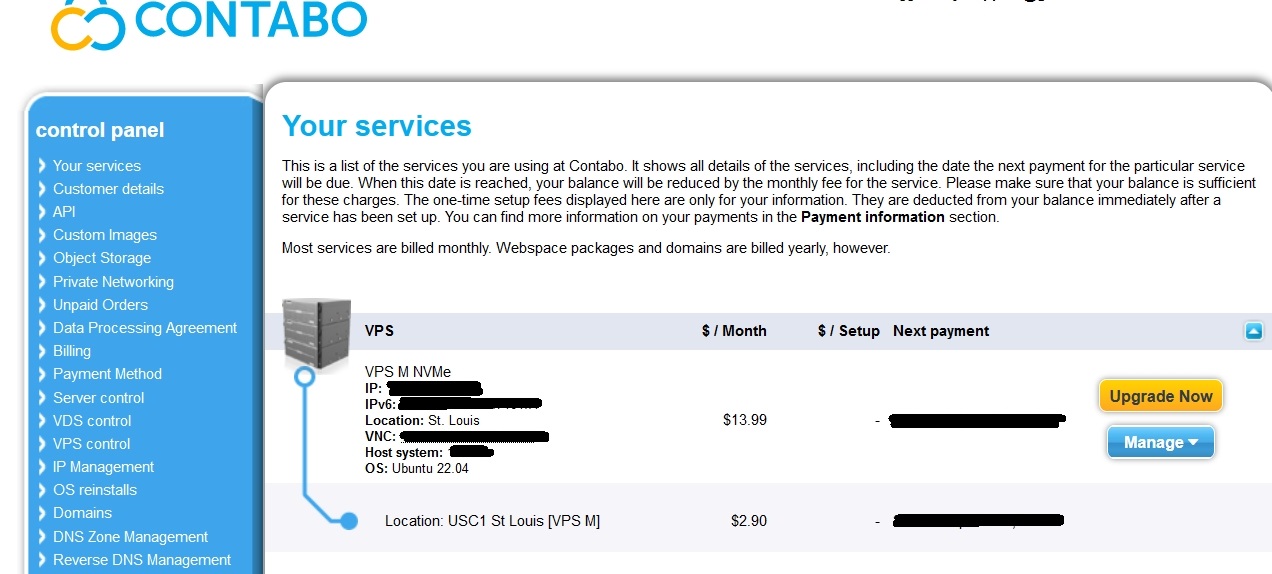
Highlight and copy Your-IP.
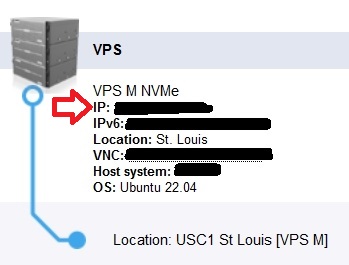
Paste the IP into your server text file where Your-IP is. Save the file.
Minimize your Nightly window.
We are ready to start loading the Ubuntu server!
Next task: Access the Ubuntu Server
_______________________________________________
COMMENTS - Final Preparations
_______________________________________________

_______________________________________________
If You Like This:
I may make affiliate fees from services you select on this website.
Thank you!
©1998-2025 RocketRanch